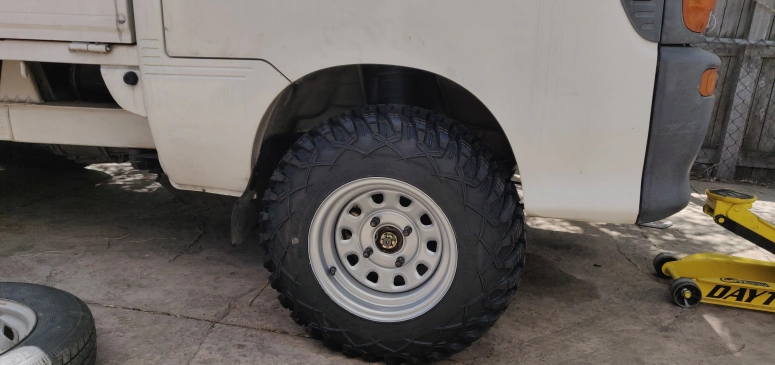
 New wheels and tires next to the old ones
Intro
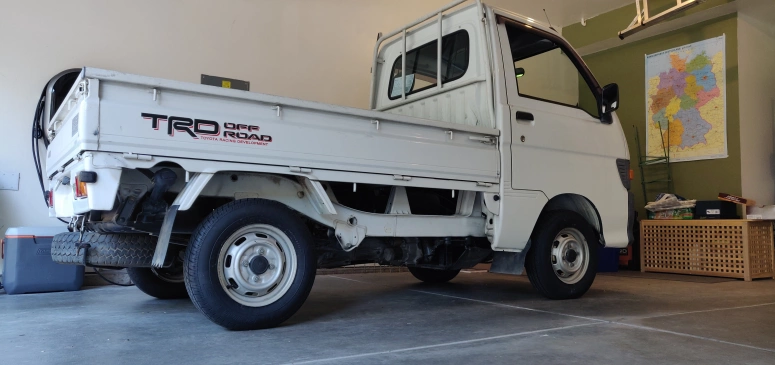
My plan for the Daihatsu Hijet is to convert it to a capable off-road worthy truck. After getting the basic maintenance out of the way, the next logical step is to install a lift kit and add bigger tires. In the off-road world it is all about ground clearance and angles. Being such a tiny truck the Daihatsu already has some pretty good approach, breakover, and departure angles. However, ground clearance is pretty mediocre with about 6" of ground clearance from the lowest point (the rear diff).
This post will quickly go over on how I installed the new wheels and tires.
Equipment Used
- Tusk Terrabite® Radial Tire 25x8-12
- ITP Delta Steel Wheels 4+3
- 4/110 bolt pattern, part number: 1221753032
- 2 Inch lift kit
- Custom made I believe from the seller “venessasmiles”. Really good quality.
- Gorilla lug nuts 21133BC
- (12mm x 1.5 thread)
- Hub centric rings
- 66.1mm to 67.1mm
- E-Z Tire beads
- 2oz for all 4 wheels
Tire Decisions and Info
I originally was going to go with 23x10-12 tires, but opted to go for a 25x8-12. I wanted to have as much ground clearance as possible and wanted to avoid rubbing into the suspension with wider tires. 10" wide tires are be able to fit a Daihatsu, but will most likely need spacers or different offset wheels to be able to fit well. Even though I wanted bigger tires, 25" tires is probably the max size tires one can go. MAYBE a 26" can work, but bigger than that will lead to a lot of clearance issues. I also did not want to go higher than a 2" lift kit to avoid any other complication like having to lower the transfer case or something.
One thing I learned from this entire process is that tire and wheel manufactures are not precise at all (or i’m just dumb and don’t understand). Wheels are not measured as one would expect. A 7 inch wheel is not exactly 7 inches and a 25 inch tire is more like a 24 inch:
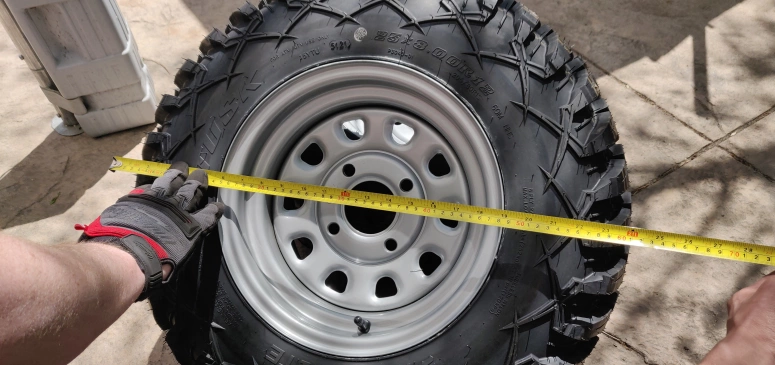 Measuring Tusk Terrabite diameter
Front Lift Kit
Installing the front lift kit was very simple. Just jack up the front of the truck, remove the strut suspension, and install the “top hat” spacer from the lift kit:
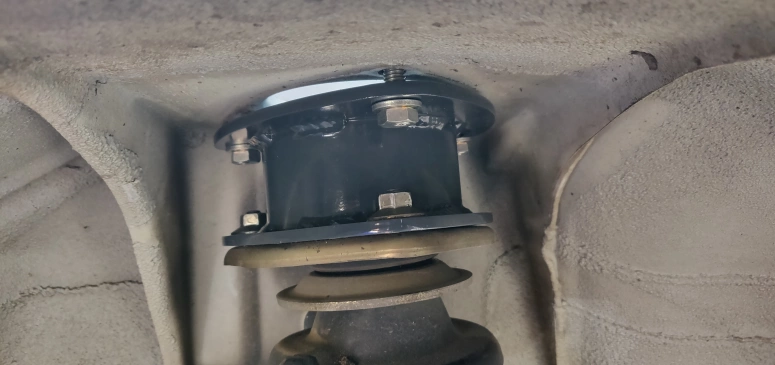 Front lift kit spacer installed on strut
 Front lift kit spacer fully installed
You might get lucky and be able to just undo the top of the suspension and slide the spacer between the strut and frame. I was able to do this for the driver side, but not the passenger side. If you have to remove the entire strut, remember to torque down the two strut bolts at the bottom to the proper 93nm/69lbf-ft.
On the passenger side I also had to grind a bit of the suspension lip at the bottom seen here:
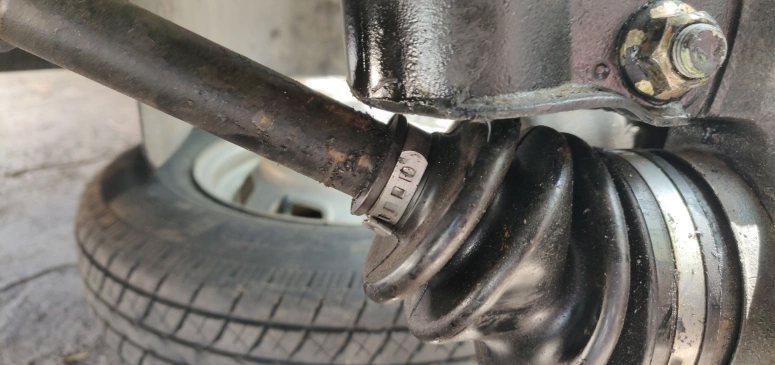 Bottom strut lip grinded down to not hit CV axle
Part of the bottom suspension lip was touching and grinding against the CV axle at its extremity. You can see in the image the gouge marks it was making when I was spinning the CV axle. The suspension will not hit the CV axle with some weight on the suspension, but might as well grind this while you are here anyway.
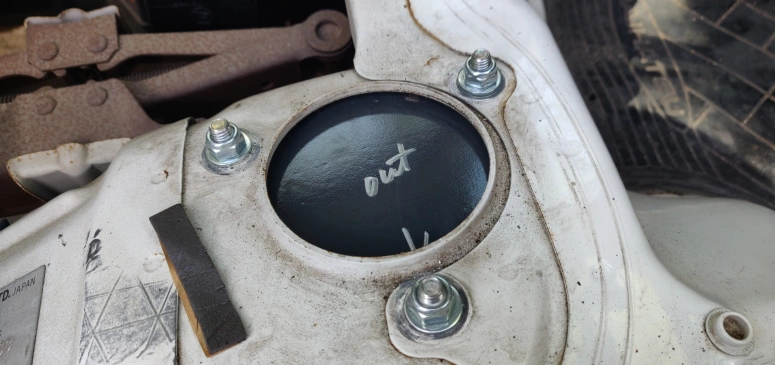
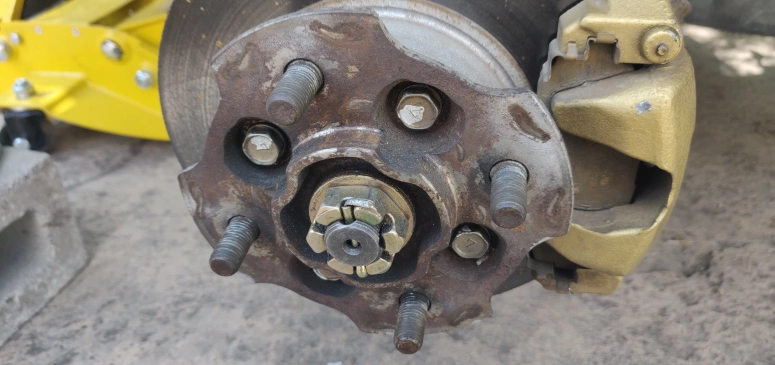
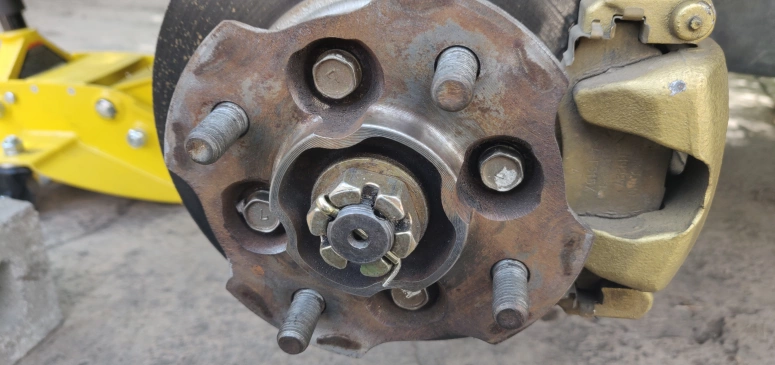
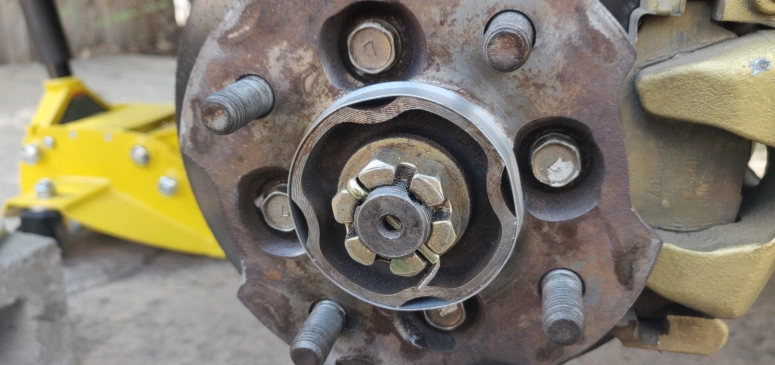
Hub Centric Rings
With the wheels removed the next step is to install the hub centric rings. This is all dependant on the wheels you get, but for the ITP Delta Steel wheels, I needed a 66.1mm to 67.1mm ring. You can most likely get away with not installing these since the S110P does not really go above 60mph, but they don’t cost much and will insure a better fitment.
If you are going to install hub centric rings, clean off the old hub first before you install. If you have a bit of trouble placing it on like I did, a little bit of of anti seize helped me out.
Front Completed
Rear Lift Kit
Installing the rear lift kit was a little bit harder than the front, but still very easy.
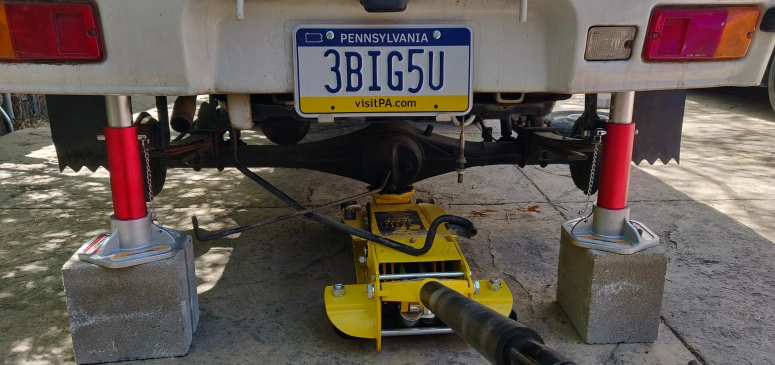
First remove the spare tire as this is in the way. Then jack up the rear and place jack stands on the rear frame. I didn’t have tall jack stands so I ended up using concrete blocks, maybe not the safest, but concrete can handle compression really well.
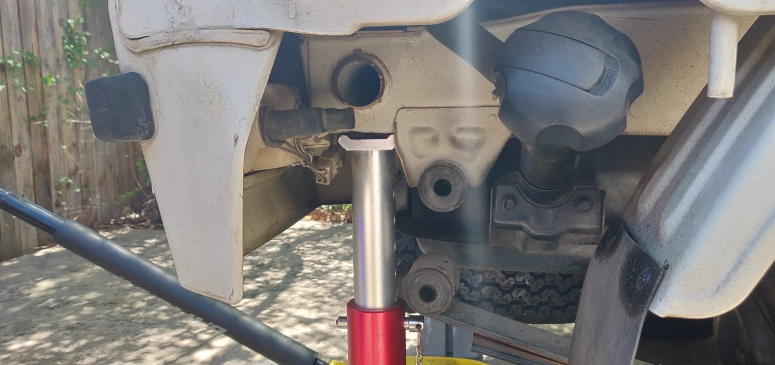
Next you need to remove the old shackles. This involved a little prying with a pry bar for me. Once the shackles are removed, lower the rear diff enough that you can install the new longer shackles as seen here:
An easy way to know how far you need to lower the diff is to simply install the new shackles on the top mount and then slowly lower it until the holes match up with the leaf springs.

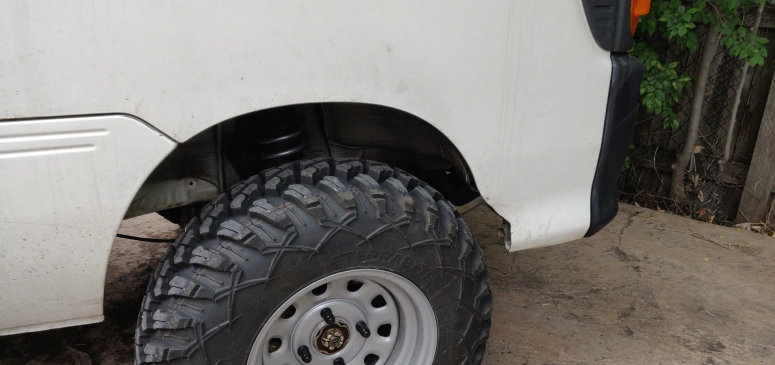
After you bolt everything up in the rear, lift on the rear diff again so you can place the new wheels and end up with:

Rubbing
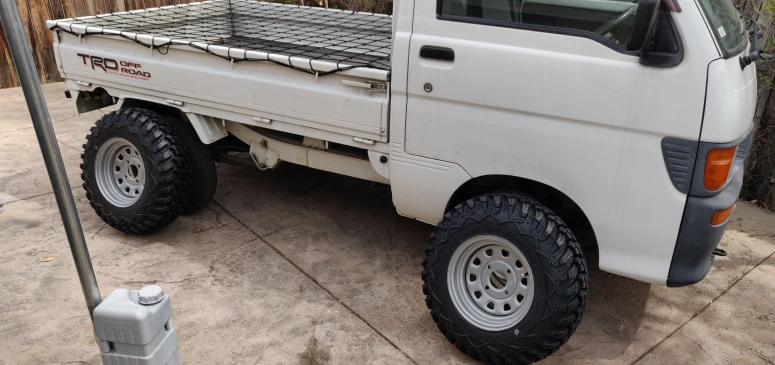
Chances are you will have a bit of a frame rubbing issue installing a bigger tire. At first I cut just enough so it does not rub when driving down paved roads. However, when taking it off-road I was still rubbing when going over ditches and bumps on the trail. I ended up cutting and grinding just a bit more of the door and frame. This is what I ended up with:
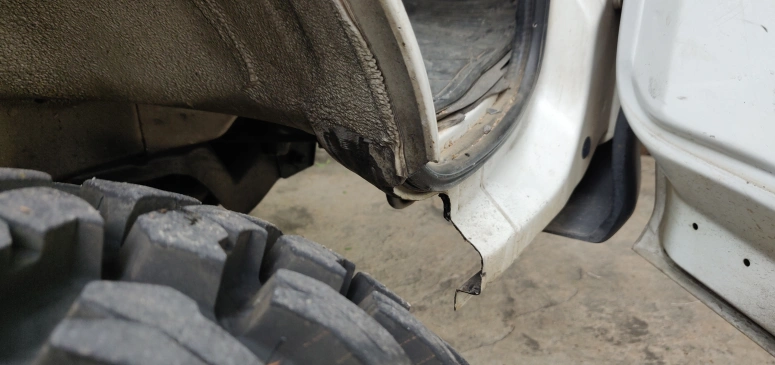
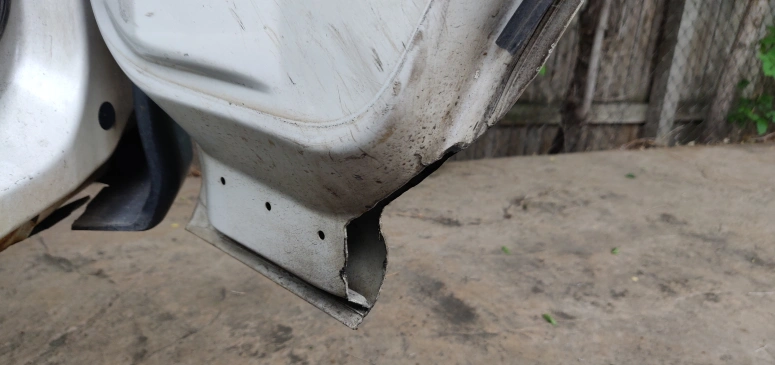
You can see compared to the previous image posted that a good chunk was cut off, but all kept away from the actual inner cab. With this cut and upgraded springs(future post) I have not run into any rubbing issues yet.
Remember to paint over any raw metal you exposed after cutting and grinding. I just used a clear coat of high temperature caliper paint.
Before and After
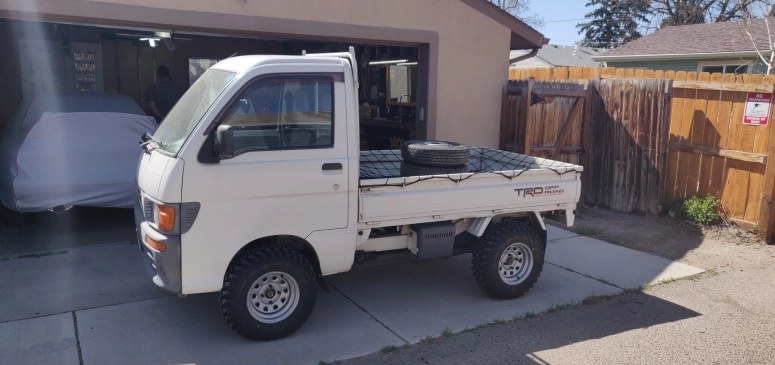
So in the end I went from 6" to 7 and 3/4" of ground clearance from the lowest point on the S110P which was the rear differential. Was really hoping for 8", but maybe with 26" tires that could be achieved (or a true 25" tire diameter).
Also the old tires I was had before this were trailer tires which were about 21" in diameter (145 R12)