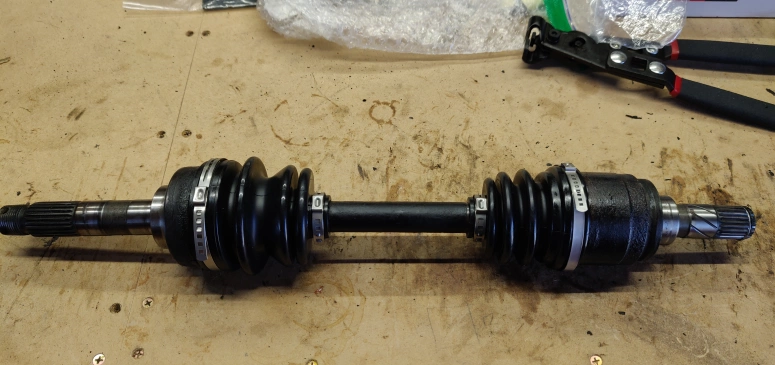
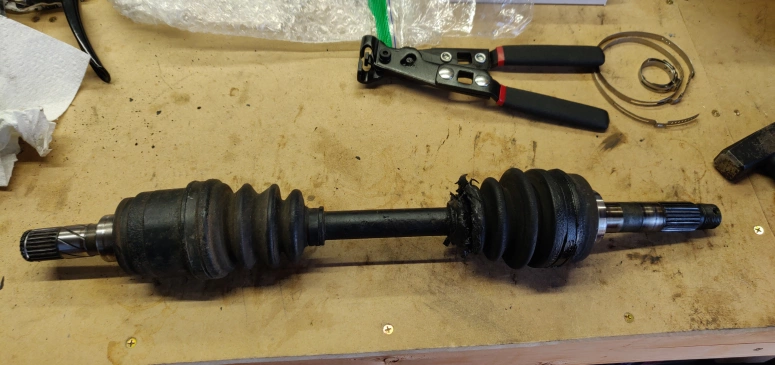
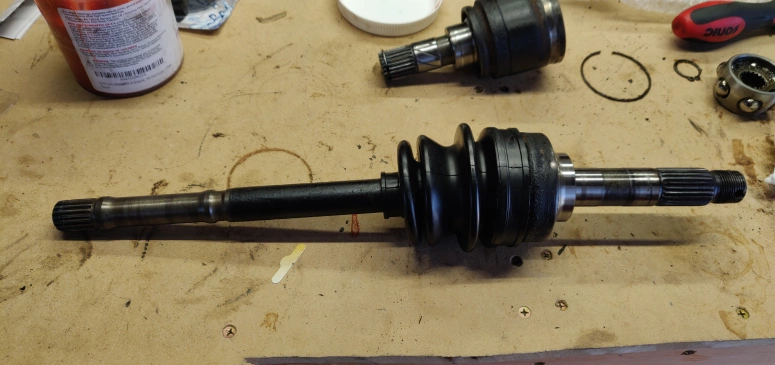
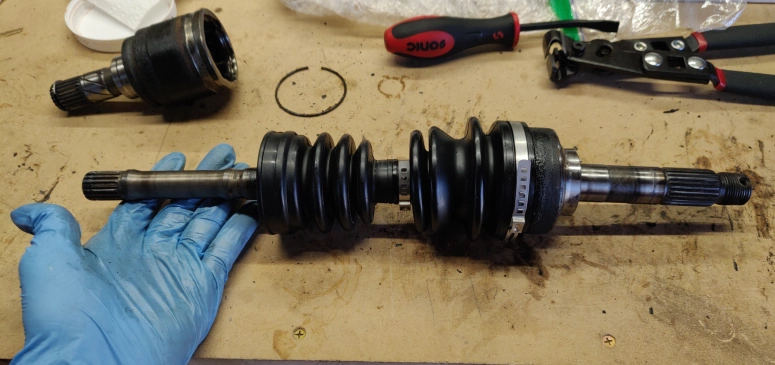
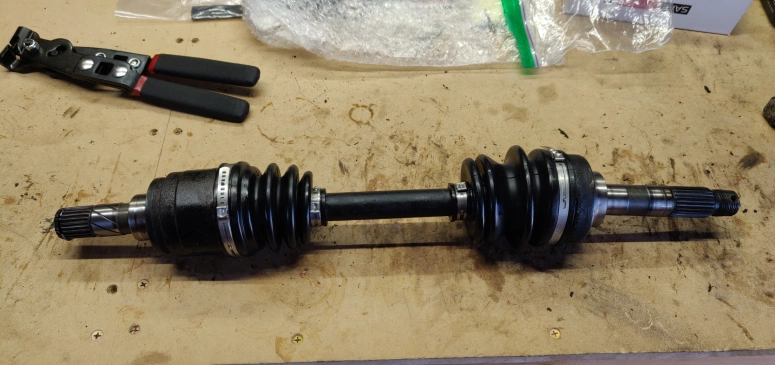
 CV axle with new CV boots on a bench
Intro
After purchasing my Daihatsu Hijet I was informed by the mechanic from the location I went to get it serviced that my CV boots were torn and should be replaced soon (my friend’s house I was staying at literally has no tools cause the own a Tesla). So after the service shop shoved a ton of grease into the CV boots as a temporary fix, driving the Daihatsu Hijet all the way from Seattle to Denver, and ignoring the Hijet for a few months while I worked on other vehicles I finally got around to replacing the boots.
Provided you have all the tools needed to replace the boots this task should only take a few hours complete. This guide will also make sure you don’t take things apart out of order resulting in lots of wasted time assembling and disassembling the same components over and over again. With that said, it should be obvious I am not a professional mechanic so some terminology might be off and I am not responsible for things going wrong.
Legal disclaimers out of the way, hopefully you find this guide helpful. This guide is specifically for a 1996 Daihatsu Hijet S110P, but should mostly be the same I believe for other model years and brands (Suzuki Carry, Honda Acty, Subaru Sambar, etc).
If you see anything wrong let me know via a GitHub issue or the comments section below. Also just click here if you want to skip to the TLDR version.
Stuff Ya Need
Tools
- 17mm Wrench
- 12mm, 14mm, 17mm, 21mm, 32mm sockets and a ratchet
- Socket extension
- Breaker bar
- Ball joint remover kit
- 2 pry bars (these could be replaced with an axle hub removal tool)
- CV Boot Clamp Pliers
- There are different types of CV clamps which means different CV pliers, the ones linked are the ones I needed
- Rubber Mallet
- Hammer
- Floor jack, jack stands, wheel chocks. (Stay safe kids)
Parts and Items
- Inner CV Boots and outer CV boots
- If store listing goes down you could try G&R Imports
- CV joint grease
- You could use the grease that comes with the boots, but I wanted to go ham
- Old rags and paper towels
- Potentially a friend
Removing the Axle Hub Nut
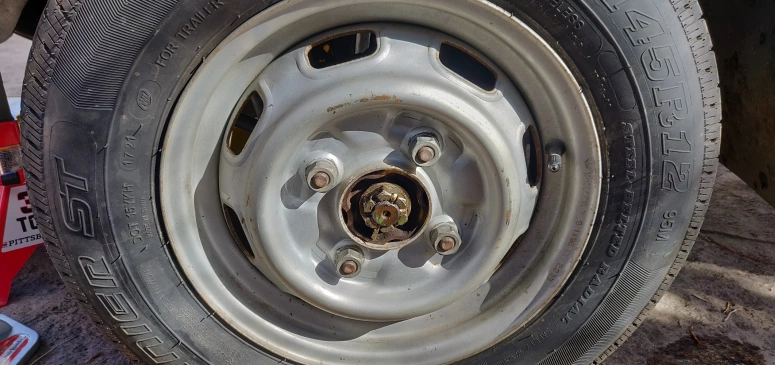 Plastic cap removed from wheel exposing axle nut
So the first step is to loosen the axle hub nut. If going solo this should be done prior to jacking the vehicle up. Simply remove the wheel cap and use a breaker bar and a 32mm socket to break this bolt loose (remember to remove the cotter pin first). If you have a friend and jack up the car before this, your friend can simply press the brakes while you break some nuts. Also remove the axle hub washer on there too while you are at it.
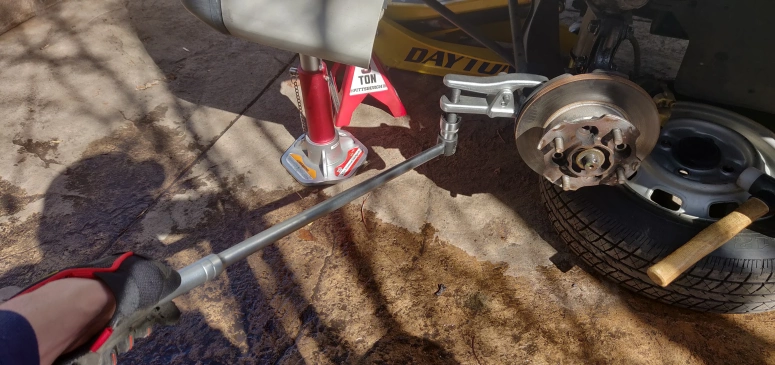
Once the axle hub nut and washer is removed, take off the wheel and properly jack up the truck if you have not done so already:
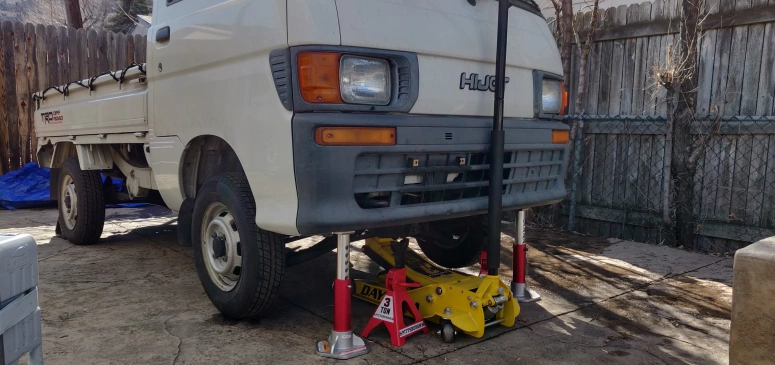 You can never be too safe jacking up a vehicle
Loosening the Hub Bolts

With the tire and axle nut removed the next step is to break loose the hub nuts. These are 14mm in size and should not require much force. If they are proving to be pesky have someone press the brakes and use a breaker bar to knock them loose.
Removing the Brake Caliper
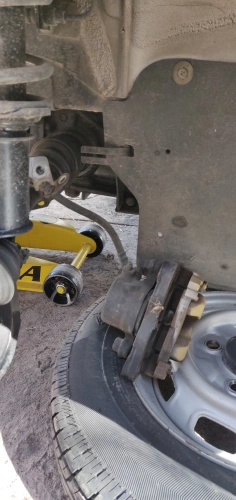
To remove the brake caliper, first remove the brake line (12mm) nut shown here:
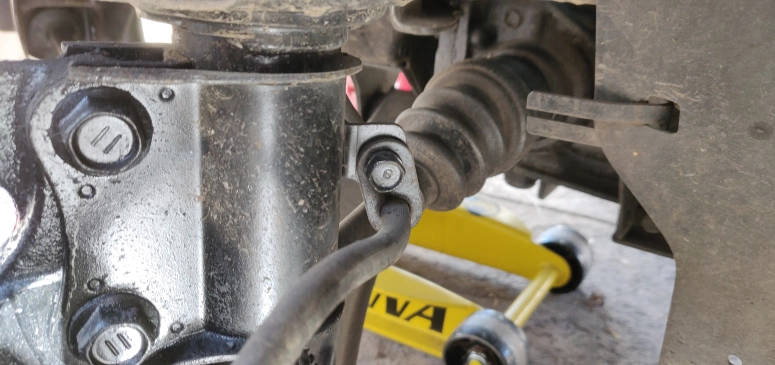
Then turn the steering wheel to allow you to easily fit a breaker bar behind the caliper and remove the bolts holding it on the knuckle (these are 17mm).
After you remove the brake caliper you can use the wheel you took off as an elevated platform to place the brake caliper onto so you do not stress the brake line:
Loosening the Bottom Strut Bolts
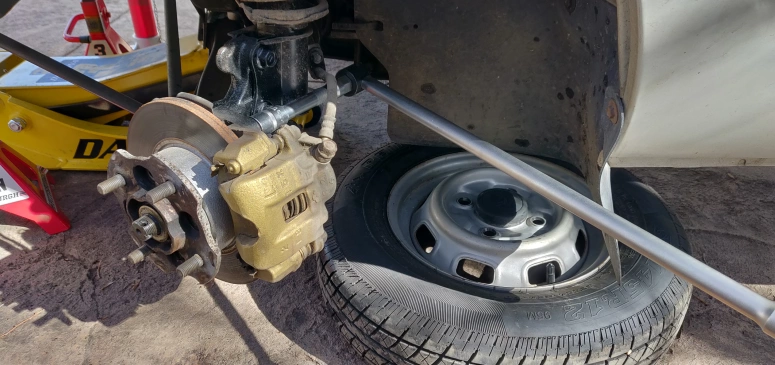
Next step is to break loose the bottom two strut bolts. These are 17mm and require a 17mm wrench and a 17mm socket with a breaker bar. Just place both of those on the nut and bolt and have at it.
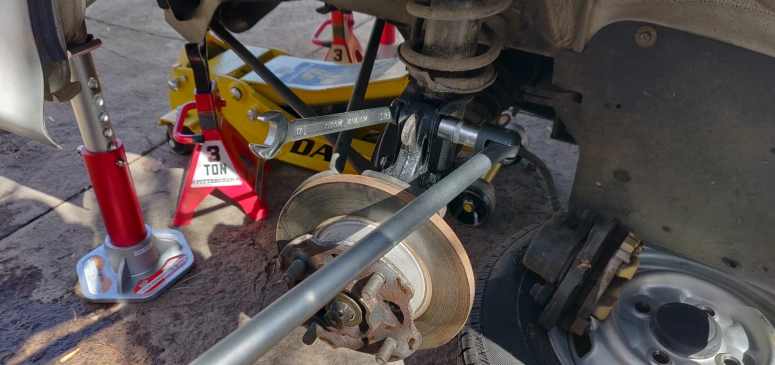
Don’t fully unbolt these just yet as you will need the rigidity of the suspension strut to remove other components.
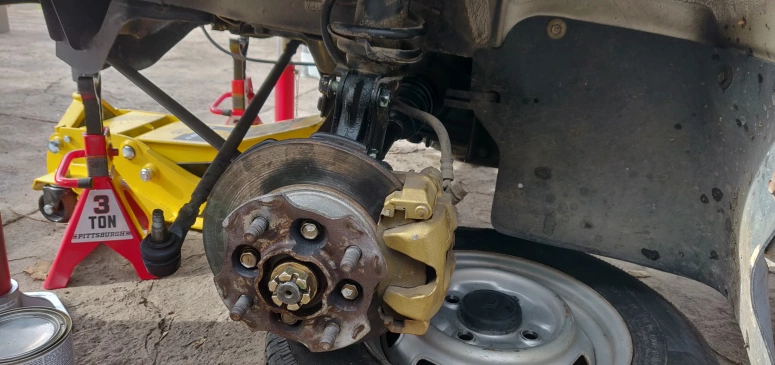
Removing the Hub and Rotor
With the hub nuts loosen, its time to take them off and attempt to slide the hub off. An axle hub removal tool would probably be easier, but unfortunately I do not own one. What ended it up working for me was using two pry bars to pry off the hub using the rotor as leverage.
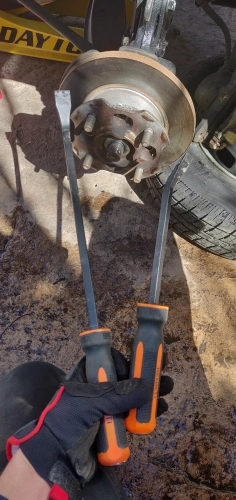

With a combination of prying and hammering with a rubber mallet the axle hub should slide out:
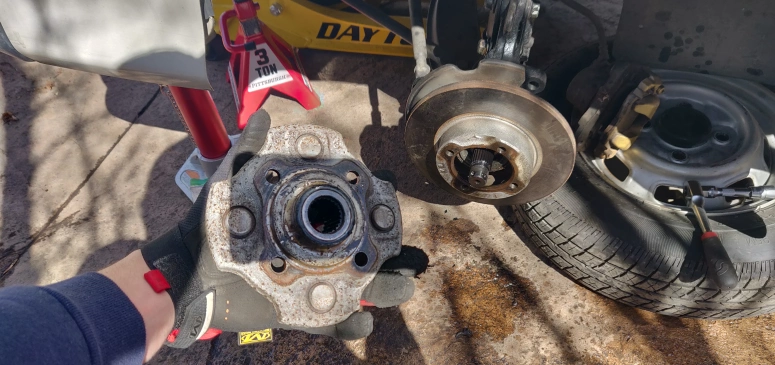
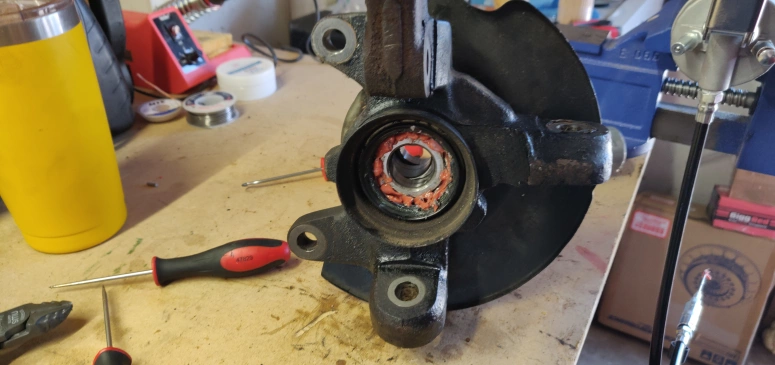
Then simply take off the dangling rotor and you are left with something that looks like this:
Disconnecting the Tie Rod and Lower Control Arm
In order to disconnect these you need to first remove the castle nuts holding them on.
Simply remove the cotter pin on them and use a 17mm wrench or socket to remove them. You might need a breaker bar, but I was able to remove them with a bit of elbow grease.
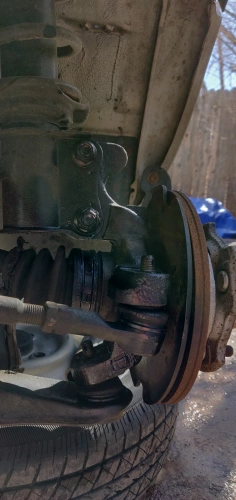
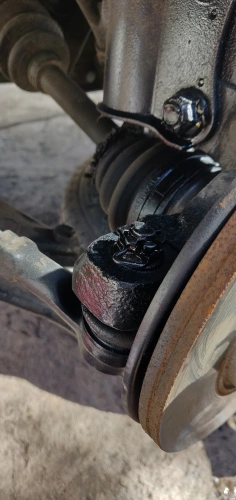
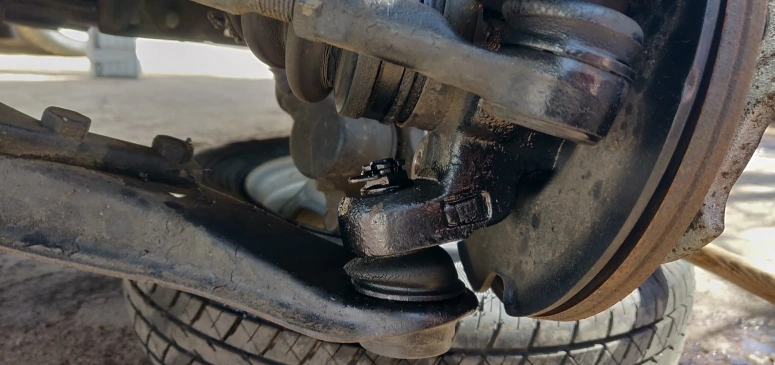
Now its time for the jump scare. The lower control arm ball joint and tier rod end bolts are usually seized up on the knuckle. To remove them we need to use a ball join separator:
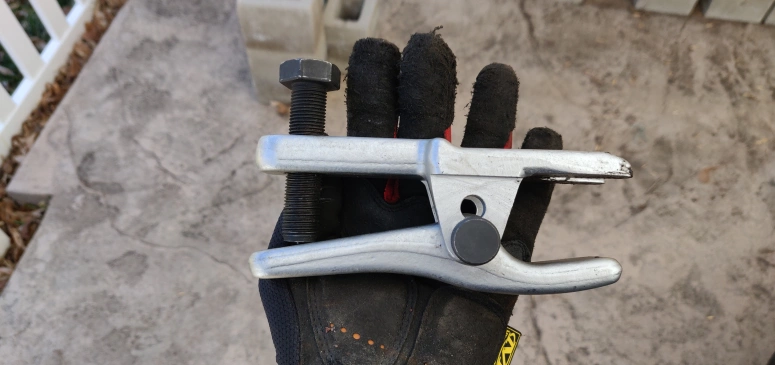
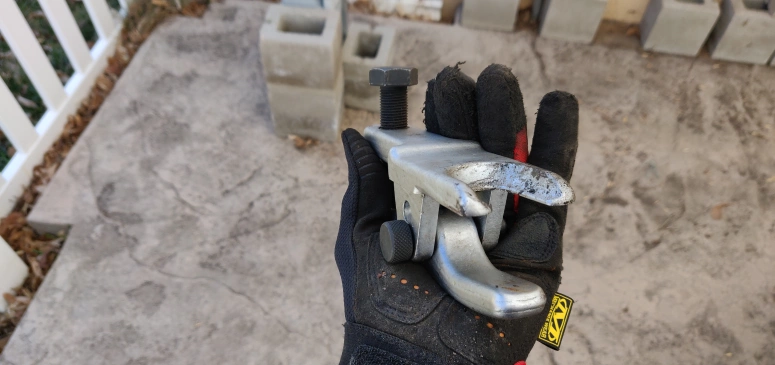
You could also use a pickle fork, but these have a tendency on ripping up the rubber boot on these joints. Simply slide the ball joint separator over the ball joint making sure to center everything so you don’t damage the bolt.
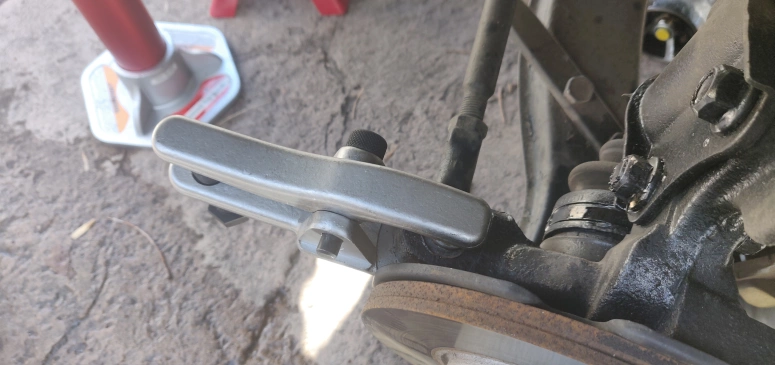
Then using a breaker bar with a 24mm socket (your ball joint separator might have a different size) slowly tighten the ball join separator until you get jumped scared by the loud pop it makes when it releases.
Remember the key here is to push the bolt out of the knuckle hole, so place the ball joint in the correct orientation. To prevent the tie rod from slamming down out of the knuckle, thread on the castle nut on the bolt leaving a bit of room for the tie rod end to come loose. This is done prior to placing the ball joint separator and will protect the bolt from any damage. As for the lower control arm ball joint, there is not enough room on the S110P to place the castle nut over the bolt and slide the ball joint separator on. So just line up the ball join separator the best you can. Try to place something underneath the lower control arm to “catch it” when it pops out of the knuckle (in my case I used the tire).
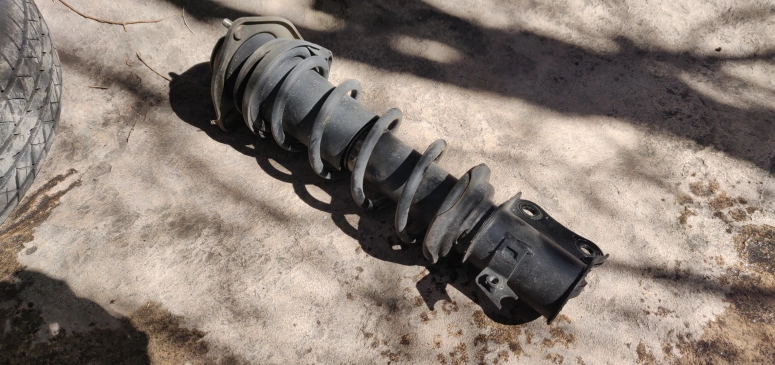
Removing the Suspension Strut
Once the jump scares are out of the way it’s time to remove the strut suspension. Undo the 12mm nuts from the top of the strut (beneath the seats) and remove the lower strut bolts you loosened earlier.
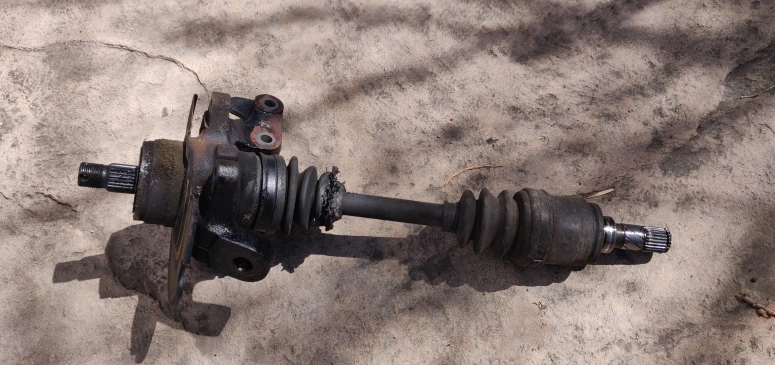
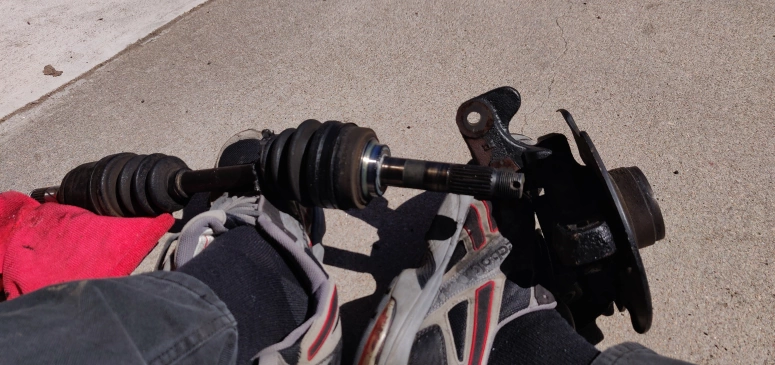
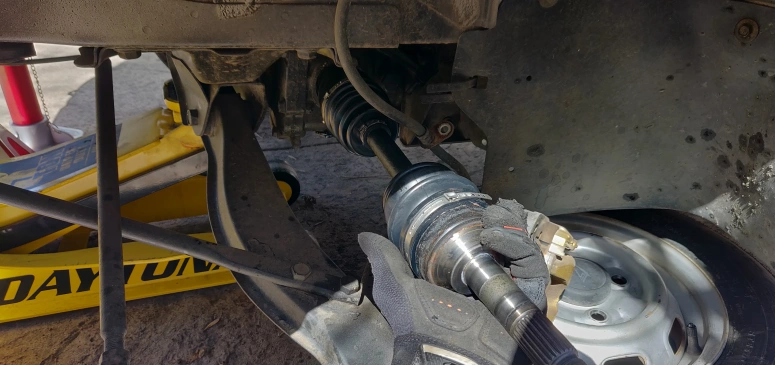
Removing the CV Axle
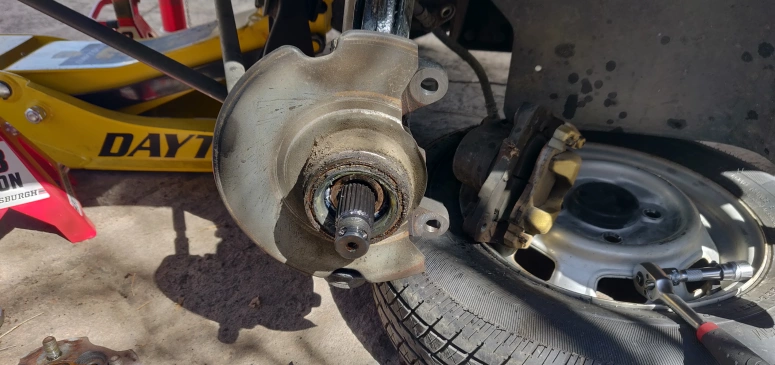
With everything else removed all you have to do now is literally yank out the CV axle from the differential on the transmission housing. This should come out with relatively low force.
Removing this might leak a bit of differential fluid. If this does happen simply drain the old differential fluid and replace it with some 80W90 gear oil. There will be a future post here showing how it is done.
Separating the Knuckle from the CV Axle
Removing the knuckle from the CV axle is a bit of a pain. After some trial and error the method I found that works best is sitting on the floor and using your feet to prop the CV axle and then hammering the CV axle through the knuckle likes so:
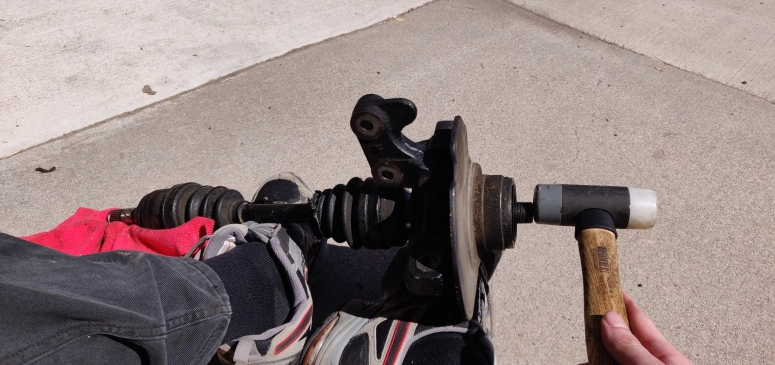
Use a spare rag or towel to prevent any scratches or damage to the inner CV joint. Yes this method is silly, but worked pretty well for me.
Replace Those Rubbers
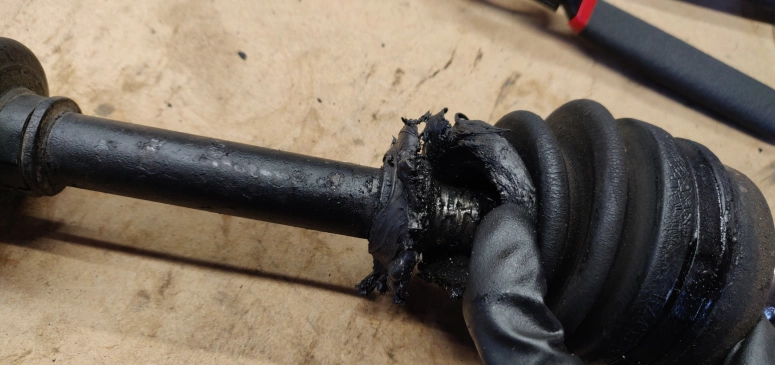
So now its time to replace these CV boots. Mine were in pretty bad shape. Both CV axles had torn boots and petrified rubber:
So the first step is to cut off all four CV clamps:
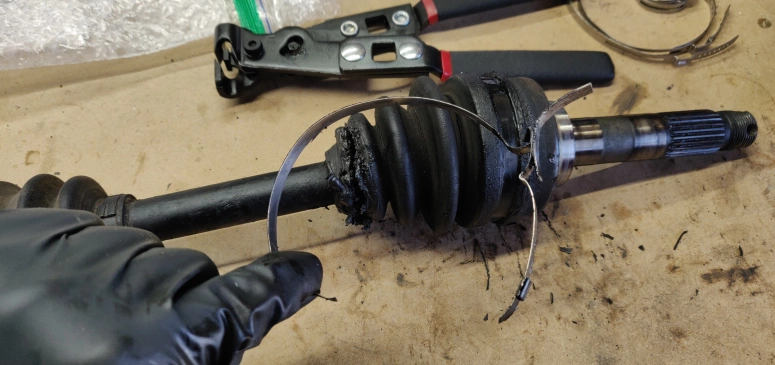
There are two of these per boot on the edges. Once these are cut, slide the inner CV joint boot down the shaft to expose the actual CV joint.
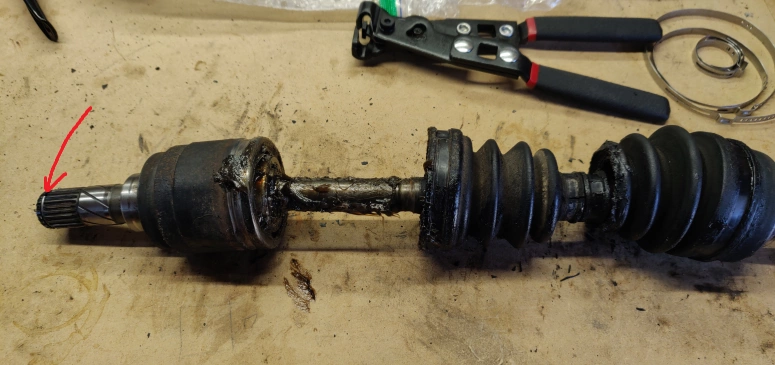
All this grease you see will have to be cleaned up as best as possible. So take your spare rags and paper towels and start cleaning up all this old grease. Notice the little metal ring on the very end of the CV axle on the left side. Make sure this does not come off as this is important to keep the CV axle into the transmission housing (this is also an obvious indicator on which side the axle is the inner side).
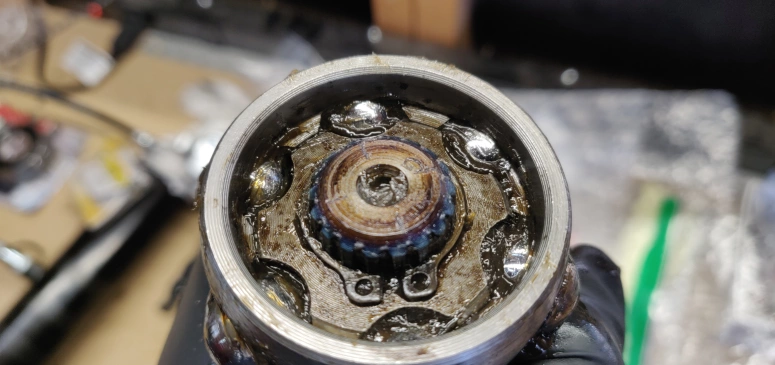
Next shove in the axle into that CV joint as much you can like so:
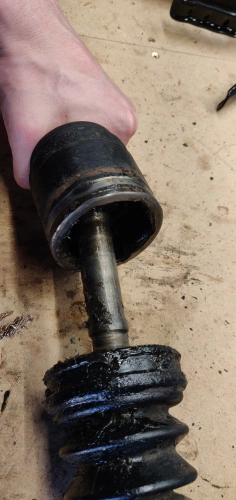
This will expose a metal retaining ring that is keeping the joint together:
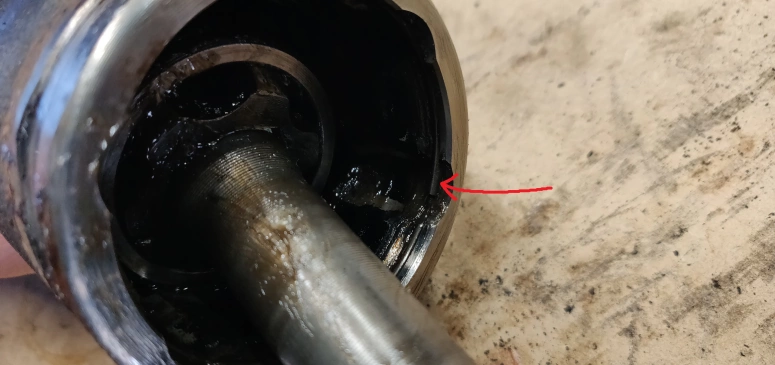
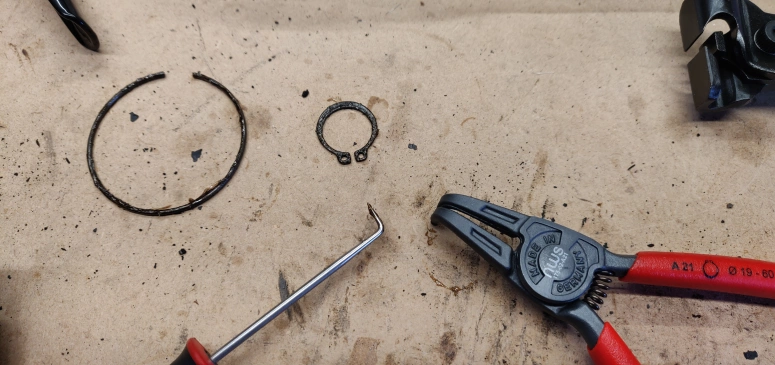
Removing this simply requires a small flat head screw driver to pry it out. Once you remove this you should be able to pull the CV joint housing from the bearing ring. Clean up all the old grease you see on everything. Then the next step is to remove the bearing. The bearing is held on the axle by a snap ring seen here:
Use some snap ring pliers and carefully remove the snap ring from the bearing without breaking or over-stretching the ring.
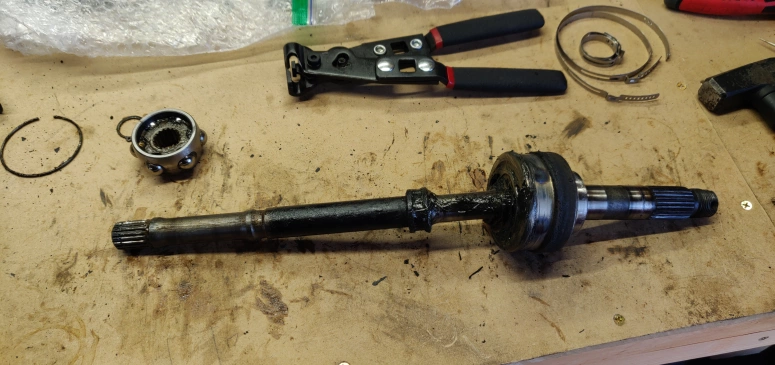
With the bearing removed you can now slide of all the old CV boots of the axle leaving you with a naked CV axle.
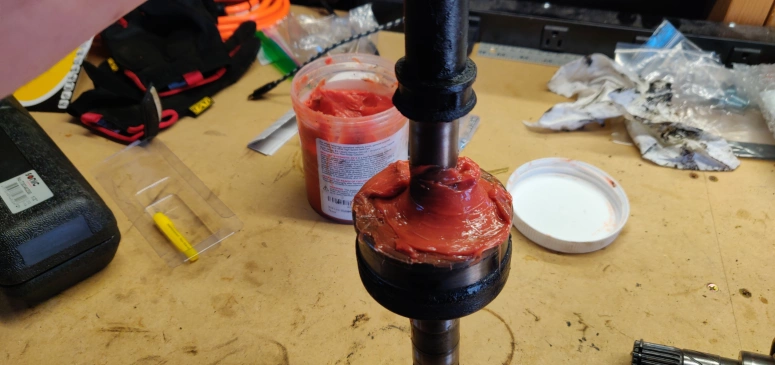
Clean up all this old grease as best you can cause the next step is to lather this bad boy with brand new grease.
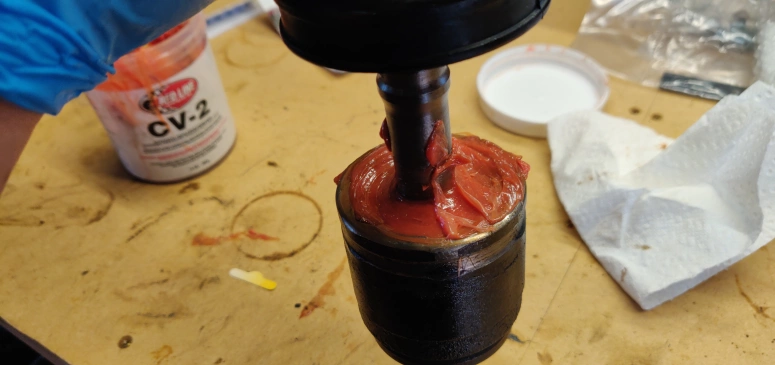
Start off with greasing the outer CV joint shoving as much you can in the bearings:
Then slide the the correct boot over the joint. For my kit the large boot was what I had to use for the outer joint.
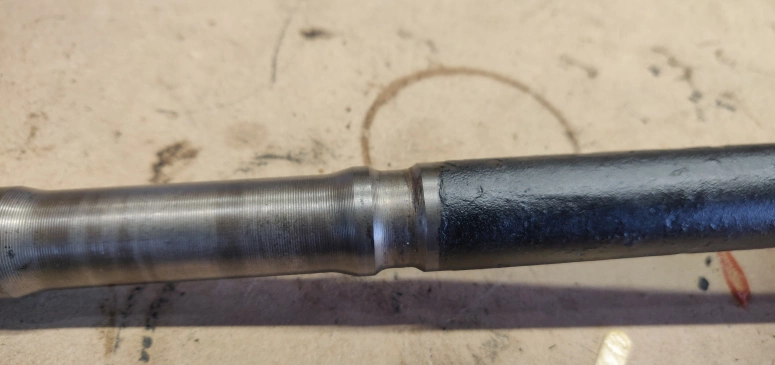
When sliding the boot make sure to line up the smaller diameter of the boot over the axle groove seen here:
After the outer joint boot is done, put some CV clamps on it (don’t tighten yet) and then slide the inner CV boot in.
Now you can put on the bearing in the correct orientation, apply the snap ring back, and grease it. Afterwards apply a big ol glob of grease into the inner joint housing, slide it over the bearing, and install the retention clip. Add more grease while you are at it too:
Slide the inner boot over the joint and put some CV clamps on it. With all the clamps placed, use your CV pliers to tighten the CV clamps.
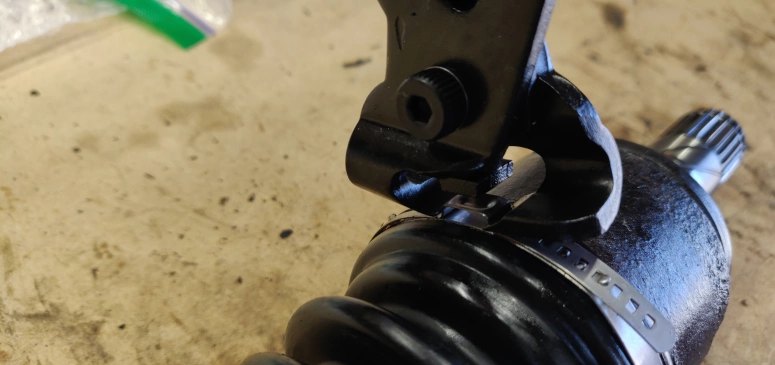
Next use a hammer to gently hammer in the clamp nubs that are sticking out. The end product will look something like so:
Putting Everything Back Together
Remember all the stuff you did to remove everything to get access to the CV axle? Well now you have to do it in reverse. I won’t completely cover this since it is just reversed instructions, but I will mention a few key steps as well as list all the torque values.
Torque Values
| Nm | lbf-ft | |
|---|---|---|
| Two Bottom Suspension Bolts | 93 | 69 |
| Top Suspension Nuts | 40 | 30 |
| Brake Caliper Bolts | 112 | 83 |
| Hub Face Screws | 47 | 34 |
| Axle Nut | 196 | 145 |
| Tie Rod Castle Nut | 46 | 34 |
| Lower Control Arm Castle Nut | 46??? | 34 |
Pointers
First off, when sliding the CV axle back into the transmission housing, twist it around till you feel the grooves slide in. Then take a mallet to tap it completely into the housing.
Before sliding the knuckle back on make sure to grease the bearings:
The last thing to mention is if you have problems sliding the axle hub in, you can use the axle hub nut to slowly push it in till it’s seated. Remember the axle hub nut is one big castle nut, so it should be very apparent how far the nut should thread on the axle.
TLDR
Steps to take things apart in:
- Remove the axle hub nut
- Loosen the hub bolts
- Remove the brake caliper
- Loosen bottom strut bolts
- Remove the axle hub and rotor
- Disconnect tie rod and lower control arm
- Remove suspension strut
- Remove the CV axle
- Separate the knuckle from the CV axle
- Take off inner CV joint
- Replace CV boots
- Re-assemble
Summary
So overall nothing too complicated. Looking back on this I probably should have de-greased the CV joints to completely remove the old grease. Also from here on out I will moisturize and exfoliate the rubber CV boots to keep them nice and rubbery.
One random benefit that came from my CV boots tearing was that it flung and coated CV grease on everything which is a fantastic rust prevention method. So nothing to complain about there.
Remember, if I said anything wrong call me out in a GitHub issue or in the comments below.