 Torn 25+ year old tie rod boot
Intro
While replacing the CV boots on my Daihatsu Hijet I noticed that all the rubber boots on the tie rods and lower control arms were in rough shape. Most of them were cracked and very brittle due to being 25+ years old. Some actually had tears in the boots exposing the insides of the joints. Luckily all the joints were still in good condition so all that was needed to do is replace the rubber boots.
Tools Needed
- 17mm, 21mm socket and ratchet
- Pliers
- Probably a breaker bar
- Small flat head screw driver
- Ball joint seperator
- You could also use a pickle fork since at this point you don’t care about tearing the rubber
- Joint grease
- Grease gun
- And most likely a grease needle injector
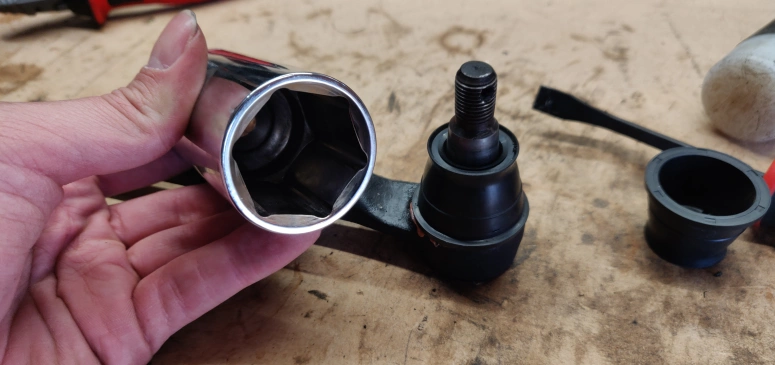
- Really big 31/32mm socket and or pliers
Getting Access to the Rubbers
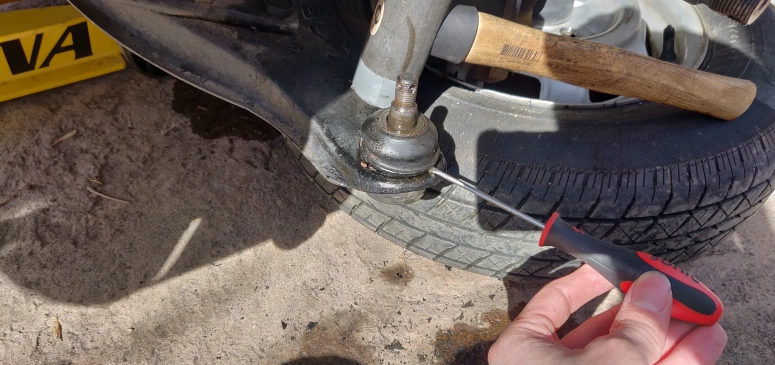
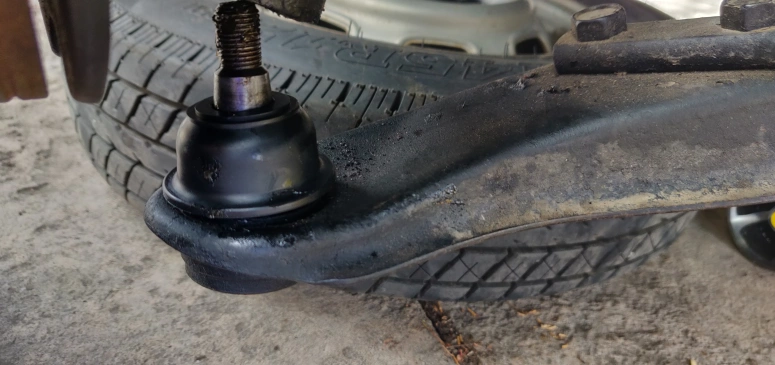
The first obvious step is to safely jack the front end of the Daihatsu up and remove the front wheels to have easier access to the tie rod and lower control arm joints. With the wheel removed you should now have a clear view on the problem rubbers:
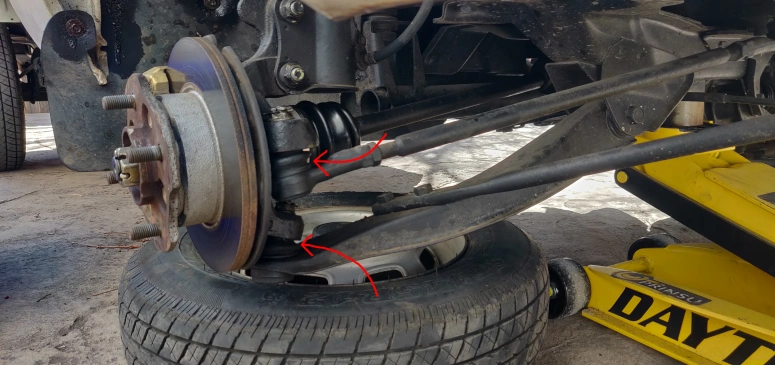 Lower control arm ball joint boot and tie rod boot location
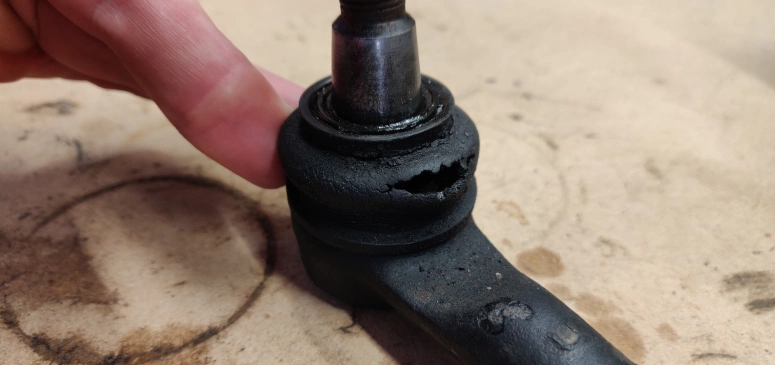
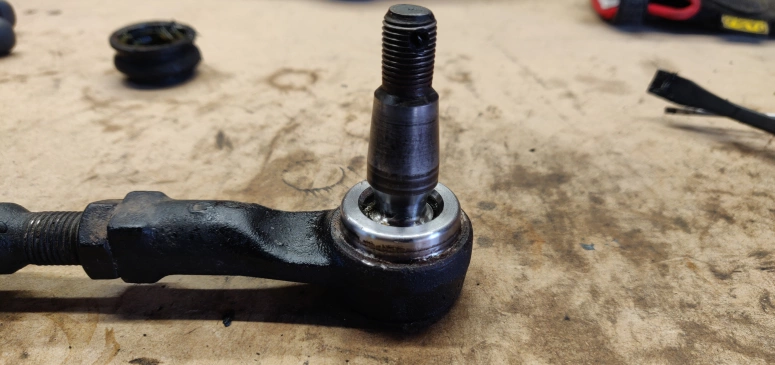
Taking a closer at rubbers you can see the heavy rubber wear:
 Tie rod boot wear
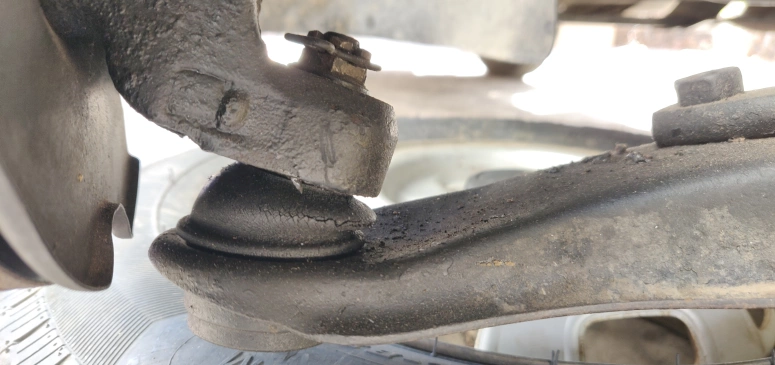
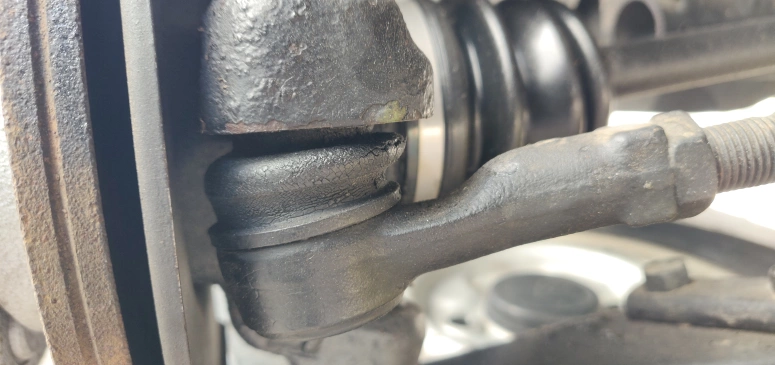
A more detailed walk-through can be found in a previous post, but removing both the tie rod and lower control arm joint requires the removal of the 17mm castle nut along with the use of the Ball joint separator. Use some pliers to remove the castle nut cotter pin, break loose the castle nut with the breaker bar, then use the ball joint separator and get jump scared. The inner tie rod joints can simply be removed with a breaker bar, but reaching them can prove a bit tricky. A flex-head ratchet or breaker bar can be useful.
Once everything is separated, just use a flat head screw drive and pop off all the old rubbers:
Slipping on the New Rubbers
First thing first, part numbers:
- 4547987508 (Tie rod boot)
- 4334587508 (Lower control arm ball join boot)
Before installing the boots, clean off all the old grease on the joints:
After all the old grease is removed the next step is to simply put on the new rubber boots. Unfortunately putting the new boots on was a little tricky since they are so precise in size. For the tie rod boots I used a 31mm socket to hammer in the new boot:
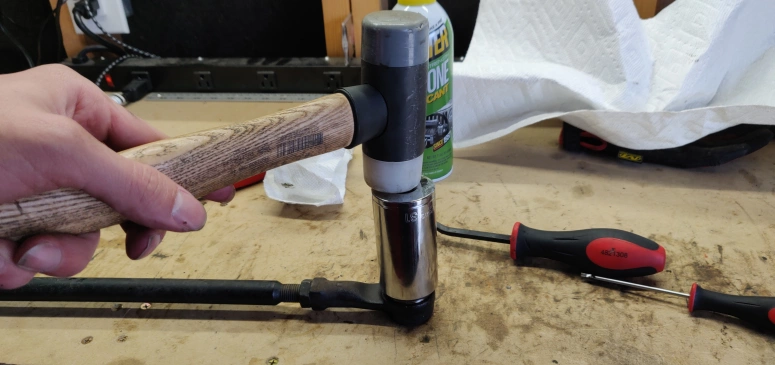
A more cylindrical tool would have been better, but the 31mm socket worked well enough. Just be careful not to damage the boot.
For the lower control arm ball join boot I did not have any big enough socket to use. I instead used a pair of pliers and slowly clamped around the edges of the boot until it was seated completely.
Lubing up the rubbers
All that is left is using your grease gun with the grease needle and injecting the new boots with a lot of grease. Rather than pierce the rubber, I placed the needle between the boot the joint arm/bolt and squeezed grease through there.
Conclusion
Put everything back together and don’t forget the torque values for both the castle nuts are 46 NM / 34 ft LBS. EZPZ.