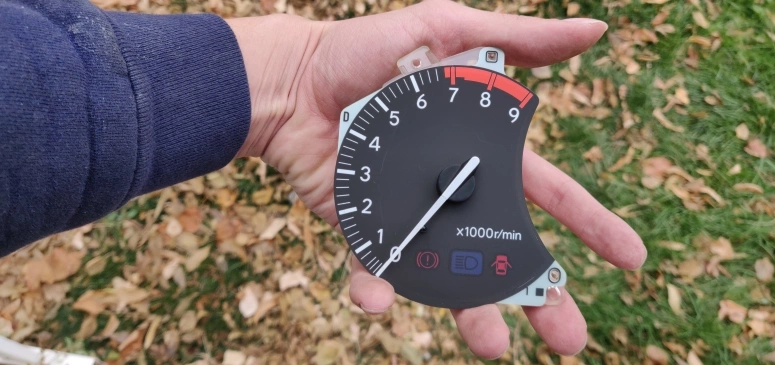
 ST205 tachometer removed from instrument panel
The Problem
Upon buying my Toyota ST205 I noticed that the tachometer was not working properly. It would never go above 3k RPMs despite hard acceleration and the car would idle at 200 RPM which didn’t quite seem right. Here is a short video of how the tachometer behaved on idle:
After some research online I discovered a thread that suggested replacing the capacitors on the tachometer as a potential fix. Luckily doing this fixed my issue and this post will briefly guide you on how to get access to the tachometer and replace the capacitors yourself.
Instrument Panel Trim Removal
The first step is to remove this trim piece:
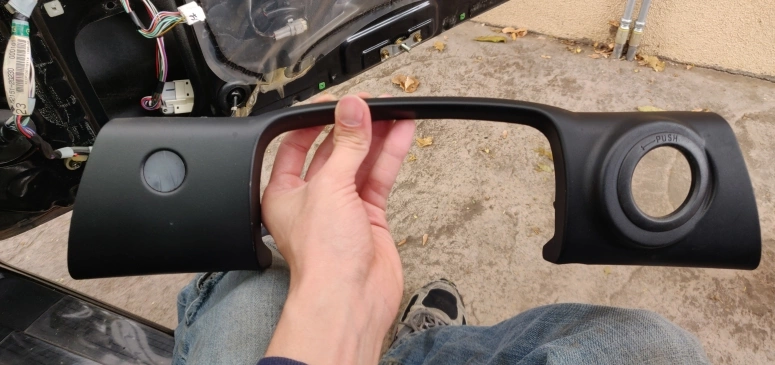
There are no screws holding it in place, so take your trim tool and slowly start popping off the tabs. Here are the locations of the metal tabs to place the most leverage on:
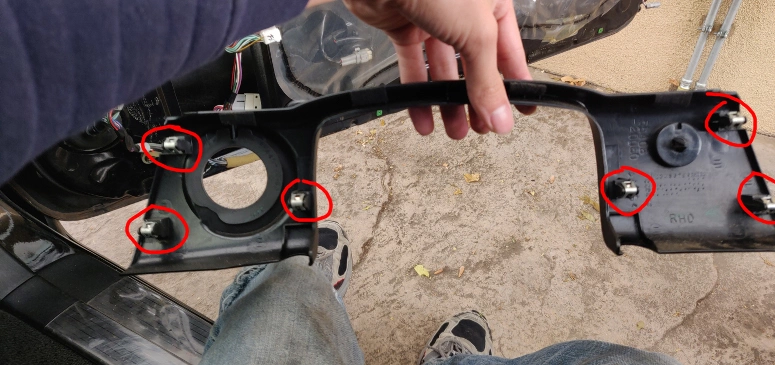
Once this is off the next step is to remove the plastic trim surrounding the instrument panel. There are 4 screws holding this in place:
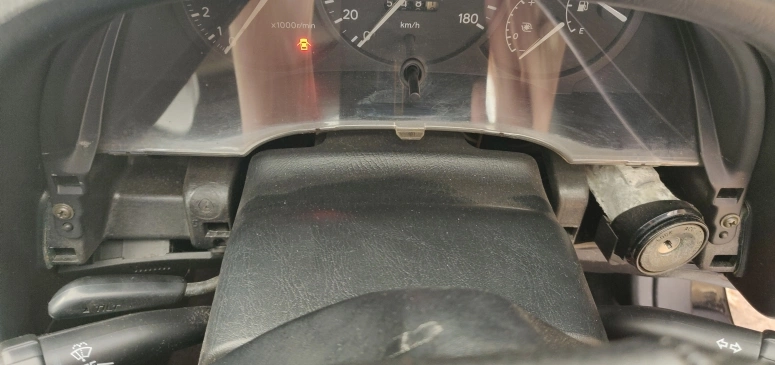
After this is off all that is left is to just wiggle the instrument panel loose and disconnect the three connectors from the back of it. Take your time to make sure you don’t break anything.
Tachometer Removal
I’m afraid I didn’t take any pictures for this, but to get access to the tachometer you will need to slowly disassemble the instrument panel by unscrewing the screws holding the plastic faceplate. Then you will need to remove the surrounding plastic trim shroud by pressing on the several tabs that are holding it in place. (This will be a good time to clean the clear plastic faceplate to remove any dust or marks.) After removing the face plate and shroud, you should be able to see 3 screws holding each of the gauges in place on the back. Unscrew the three screws from the tachometer gauge and gently remove the tachometer from the instrument panel.
These instructions are from memory so I may have missed a step or two. There should not be anything complicated on this removal. Just take your time and use your noggin to see how everything is held together. If requested I would not mind disassembling the instrument panel again to take pictures of the process.
Capacitor Replacement
Now with the tachometer removed we can now replace the two capacitors on the circuit board:
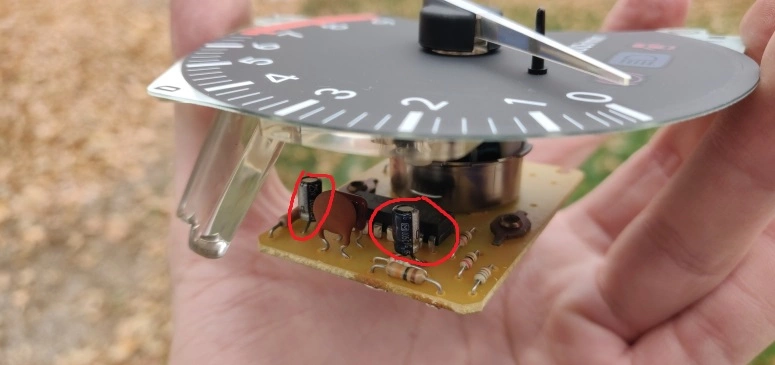
As you can see there is plenty of room on the side to desolder the old capacitors and resolder new ones. There is no need to remove the actual dial face and needle. The capacitors I went with is the Panasonic EEA-FC1E100 bought on the mouser electronics website. Even though you only need two, it might be a good idea to buy a few spares in case you break one while soldering or want to have back up capacitors for the future. Also make sure you install the capacitor in the correct polarity orientation.
After the new capacitors are installed carefully put everything back together. With a bit of luck that this was the cause of your tachometer issues, you should hopefully see a functional gauge:
Summary
Hopefully this will resolve the issue with your tachometer problem. At first I didn’t think this will work since both capacitors on my tachometer didn’t seem corroded or blown. The tachometer dial was also moving up and down prior to this fix which made me believe that it might be something else.
Perhaps one of my capacitors was bad which caused the tachometer to half function? No clue.